Morrow Wunderbuss Motherboard - Fried!
SHARE |
|

|
by Bill Degnan - 05/25/2007 19:47 |
|
Originally posted on http://vintage-comptuer.com/vcforum "..Hi - Great. Simple problem, since you have (in your pics) an identical circuit right next to the toasted one. The parts are polarized (electrolytic or tantalum) caps (both are toast, trust me - replace both), and the value is identical to the ones next to the other voltage regulator can't tell from your pics, but the value is not critical - just make sure that the replacement caps are rated at at least 16V, and anything from 6 to ... jeesh ... 100MF should work fine. If you're not an expert at soldering, *do not try to unsolder the original caps*, simly snip the leads right next to the cap body, bend the leads back, clean up the carbon goop on the circuit board ( contact cleaner, any kind of non-residue spray, or alcohol works great), and look if the traces beneath the caps are ok. If not, repair the traces. Now to the fun part - why did the caps blow? Odds are, they just *did*. or something upstream (that would be the voltage regulator itself, the black transistor-looking thing - it's a fixed -12V regulator, cost about $2 & common enough for Radio Shack). I'd take the "shotgun" approach and replace it. If you have a pile of electronic scrap, odds are you can steal one from there. Again, i'm pretty sure that one of the traces is toast - fix that. Once you've washed the board, you may still have a bunch of burnt circuit board - take an xacto knife and scrape all that crud out, 'till you see virgin substrate only (it would have no black left in it). Take clear fingernail polish and seal it. Now's the good part - you've got cap leads & and voltage regulator leads sticking out, and the pc board is in good shape. replace the VR - bend the leads away from the VR, mount the new VR straight over the old leads, clip off the extra lengths on the new VR leads, and *quickly* solder te leads together. Don't dwell on the solder joints -if the solder joint is bad, let the whole thing cool for a minute, and try again. To the caps - electrolytics are cheap but "slow", tantalums are "quick" but a bit more pricey. Go with the latter, and you can go as low as a few MF. These are not filter caps in the conventional sense - they're there to, basically, keep the VR stable under "extreme" conditions (like sudnly disconecting a heavy load) - they're barely necessary. Anyhow, it's unlikely you'll run across radial tantalums - they're mostly "gumdrops" now - just a different form factor - won't make a bit of difference in the way the power circuit works. Just make sure the polarity is correct as you install them - there's a "+" screened on your circuit board next to each positive lead, and the parts themselves will be marked with either a stripe on one side (that would be negative), or a "+" smbol next to one of the leads. You'll know. If you want to play it really safe, you could cut the powe trace to the rest of the circuit (you can bridge the slice over with solder after testing the -12V & making sure it is -12V), but ... you're basically done. I know this may not be a true step-by-step description, so if i left anything out, post or email. For more info, you can just google up "[part number of your voltage regulator] application sheet whitepaper", which usually gets you a few basic schematics, pinout, way more info on the VR itself, and the value ranges of supporting parts (like the caps). Have fun, -dim P.S. If, after following all the steps correctly, the thing still doesn't work, the problem may be downstream from the power circuit - make sure to power the thing up with no expansion boards plugged in first, and then add them one by one 'till you're either up and running, or see smoke. Check for poped 'lytics near the power rails on the expansion boards - they're the usuall culprit. ..." Reply |
|
Resources:

Popular Topics and FAQs
Past Issues:
Before we switched over to a blog format, past page archives here:
Vintage Computer Festival East 3.0 June 2006
Commodore B Series Prototypes July 2006
VOLSCAN - The first desktop computer with a GUI? Oct 2006
ROBOTS! - Will Robots Take Over? Nov 2006
Magnavox Mystery - a Computer, or? Jan 2007
The 1973 Williams Paddle Ball Arcade Computer Game Feb 2007
The Sperry UNIVAC 1219 Military Computer May 2007
VCF East 2007 - PET 30th Anniversary June/July 2007
The Electronic Brain August 2007
Community Memory and The People's Computer Company October 2007
Charles Babbage's Calculating Machine December 2007
Vintage Computing - A 1983 Perspective February 2008
Laptops and Portables May 2008
From Giant Brains to Hobby Computers - 1957 to 1977 August 2008
Historic Computer Magazines November 2008
World's Smallest Electronic Brain - Simon (1950) December 2008 - Feb 2009
Free Program Listings Spring 2009
Computer Music Summer 2009
Popular Electronics Jan/Feb 1975 - Altair 8800 Fall 2009
Early Microcomputer Mass Storage Summer 2010
PERCOM DD Drives
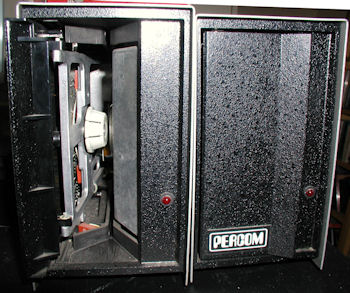
This image was selected at random from the archive. Click image for more photos and files from this set.