splicing papertape
SHARE |
|
 splicing papertape
 |
by Bill Degnan - 12/17/2018 13:23 |
 Teletype ASR 33 Papertape reader. You can feed a piece of papertape into the reader in local mode to print a section of tape.
I have found that the trick to splicing, aside from having correction patches is sometimes to overlap two pieces of tape, not try to get an exact cut in the program. To do this I stick in an S0 line (filler line) on both sides of the splice. If there is a small tear in a tape that causes the reader to snag, use correction patches. If the rip is too large to patch, you'll have to splice it, just as one would a piece of film. Here are some tips how to do this... Below is a splice of tape, represented by its data. Each 8-bit character is represented by the holes in the tape one at a time as it's fed into the reader. Let's say you determine the section of tape, with the rip marked with the brackets, reads as follows: S1131A40AE0D0A005445524D494E414C2057[49]446D (this example is a standard HEX Motorola tape): S1 = record start marker 13 = byte count 1A40 = the address to deposit the data AE0D0A005445524D494E414C20574944 - the HEX data 6D is the checksum. The checksum at the end of each line is the one’s compliment of the sum of all 8-bit bytes dropping call carries including the byte count, m address, and data. Note how the "line" starts with a S1. and ends with the checksum. The checksum will precede the next new line's data segment indicator (S1 and checksum are further explained below). In this case a clean splice involves removing everything from the S1 to the 6D. Splice in the entire line from the papertape (save the data somewhere!). NOTE: A tape is a series of sequential connected "lines". The teletype does not read in lines as if they were printed pages with a CRLF at the end of each. The papertape is read as one contiguous stream of connected "lines" with no spaces or breaks. lines (in the context of a tape repair) = "data blocks with an assigned memory location and control bits" BACKGROUND Best case is to put a cut tape back together at the spot of the original rip but it's not the end of the world if you can't do this for some reason. Also, before you waste hard-to-find patch tape, you may manually test tape segments, read in sequence, before you tie all of the segments together with tape. This way you can make sure the planned repairs are correct. It should not cause the computer program reading in the tape to bomb if a tape ends and the teletype is chattering away waiting for you to stick in the next tape segment and re-start the reader. Just temporarily stop the reader, put in the next segment and start the reader again. Kind of cool actually how it works. The program will keep running until it gets the "end of tape" S9 line. A little more about reading in data using papertape... If you have an Intel tape, go here to read about that format. Same principle, just a different format. One other thing...you can read in a section of memory twice during the read-in, so you if you want to re-run a failed tape read or you're not sure if it worked, just restart the tape read from any arbitrary point near to where you wanted to re-enter the data. Here is a more detailed repair example (rip is at [50] and we're going to insert filler lines on both sides of the repaired line) S1131A40AE0D0A005445524D494E414C205749446D S1131A5054C80020425954455320465245C[50]D0AE6 S1131A600D0A4D49545320414C54414952203638B3 STEP ONE: S1131A40AE0D0A005445524D494E414C205749446D [cut here] S1131A5054C80020425954455320465245C50D0AE6 ---> remove this section [other side of the cut] S1131A600D0A4D49545320414C54414952203638B3 STEP TWO: You now have three pieces. The front of the tape, the small segment you've removed, and the end of the tape. Punch two buffer segments and a replacement data segment. S1131A40AE0D0A005445524D494E414C205749446D [<--begin of tape end] S0000000000000 <-- manually punch this S1131A5054C80020425954455320465245C50D0AE6 <--manually punch this S0000000000000 <--manually punch this [end of tape start -->] S1131A600D0A4D49545320414C54414952203638B3 STEP THREE: Use papertape-repair tape to assemble the splices where [brackets indicate where to put the 4 pieces of tape] S1131A40AE0D0A005445524D494E414C20574944[6D S0]0000000000[00 S1]131A5054C80020425954455320465245C50D0A[E6 S0]0000000000[00 S1]131A600D0A4D49545320414C54414952203638B3 Please let me know if you try this! Teletype FAQs and more. Remember, the "S0 trick" may not work in every case as computers vary, and it might be thus best to try to attach the splices without any extra S0 lines. Yes if you're wondering you can edit a program tape using this method and add NEW code or clear out and replace memory locations by splicing "updates" at the end of the tape before the S9 line. Reply |
|
Resources:

Popular Topics and FAQs
Past Issues:
Before we switched over to a blog format, past page archives here:
Vintage Computer Festival East 3.0 June 2006
Commodore B Series Prototypes July 2006
VOLSCAN - The first desktop computer with a GUI? Oct 2006
ROBOTS! - Will Robots Take Over? Nov 2006
Magnavox Mystery - a Computer, or? Jan 2007
The 1973 Williams Paddle Ball Arcade Computer Game Feb 2007
The Sperry UNIVAC 1219 Military Computer May 2007
VCF East 2007 - PET 30th Anniversary June/July 2007
The Electronic Brain August 2007
Community Memory and The People's Computer Company October 2007
Charles Babbage's Calculating Machine December 2007
Vintage Computing - A 1983 Perspective February 2008
Laptops and Portables May 2008
From Giant Brains to Hobby Computers - 1957 to 1977 August 2008
Historic Computer Magazines November 2008
World's Smallest Electronic Brain - Simon (1950) December 2008 - Feb 2009
Free Program Listings Spring 2009
Computer Music Summer 2009
Popular Electronics Jan/Feb 1975 - Altair 8800 Fall 2009
Early Microcomputer Mass Storage Summer 2010
Felt Tarrant Comptometer J29 snJ299166
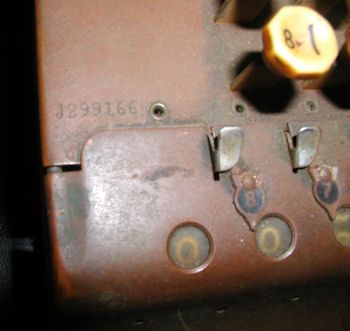
This image was selected at random from the archive. Click image for more photos and files from this set.